


This document illustrates how to fetch data from the Goodwe portal via cloud connection and integrate it into a virtual meter in IAMMETER. It supports solar generation, grid metering, and battery storage data.
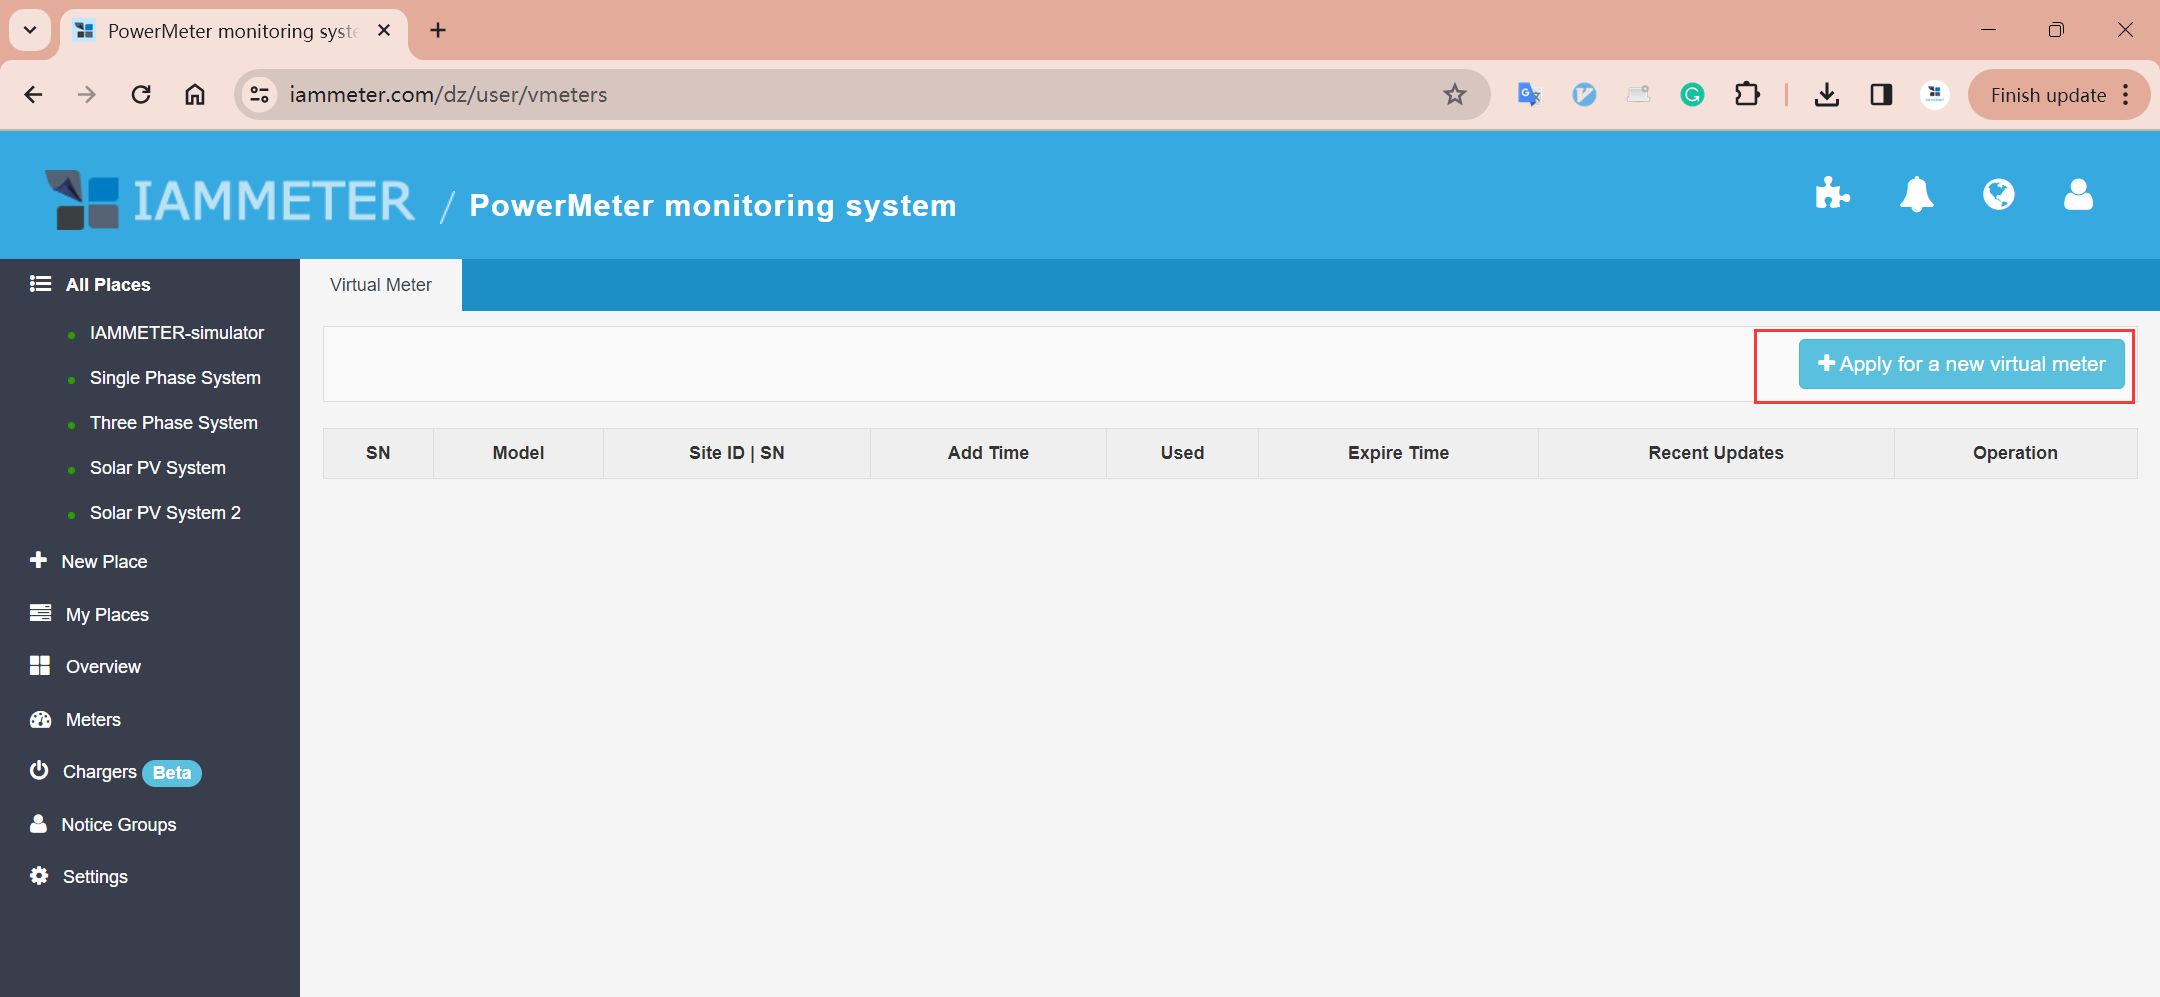
👉 How to apply for a virtual meter in IAMMETER
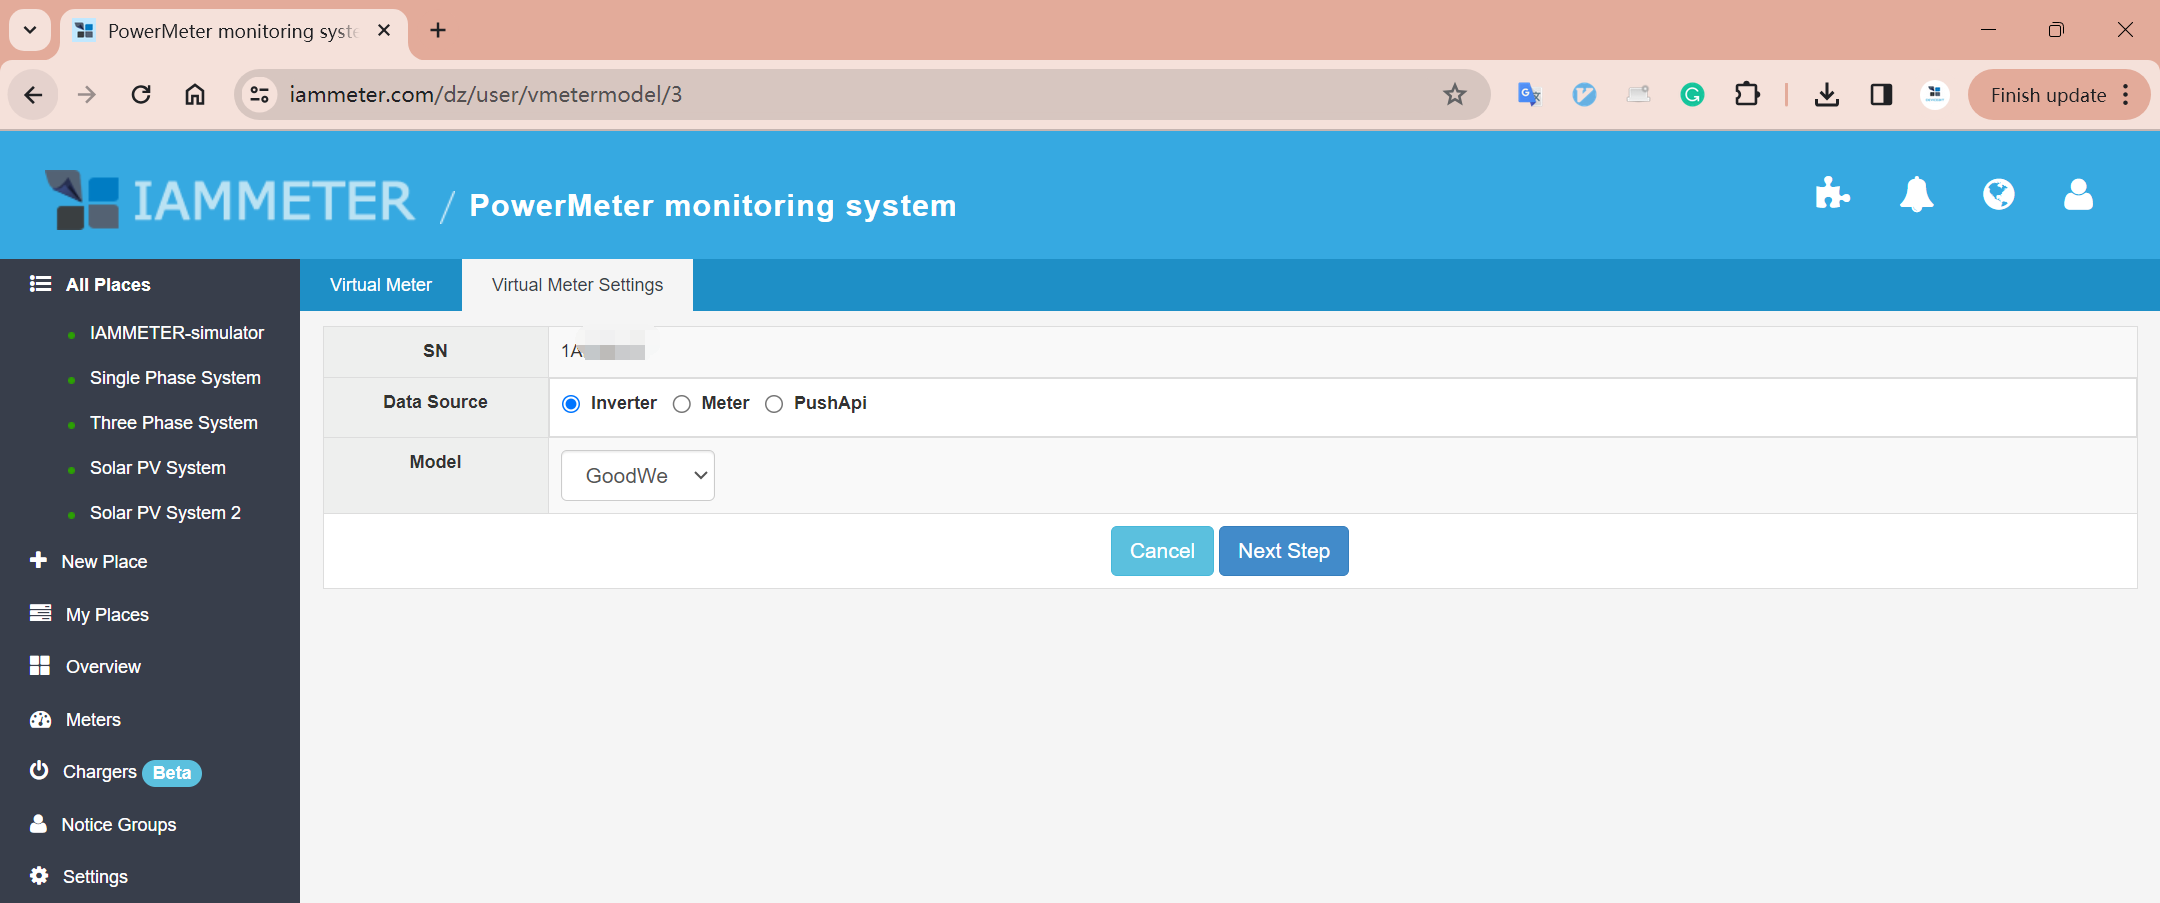
Select Source and Model
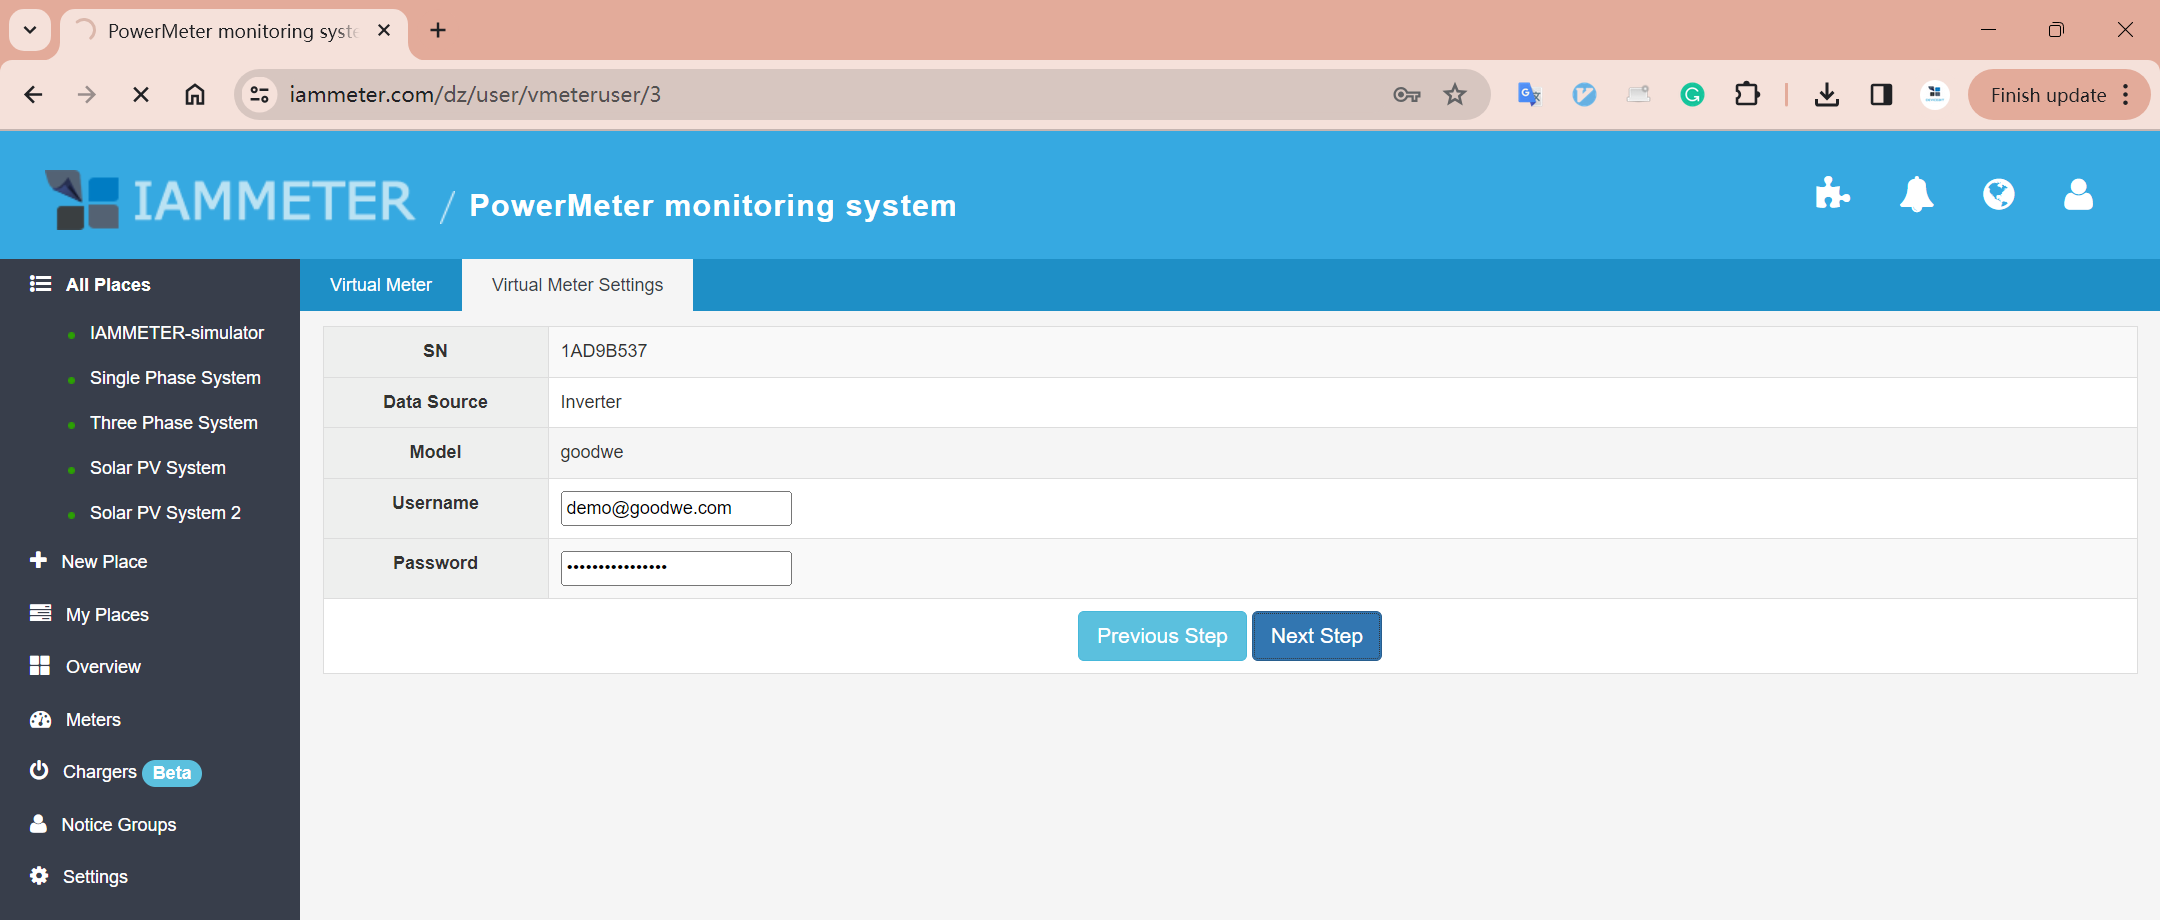
Log in to Goodwe Portal Enter the username and password registered on the Goodwe SEMS portal.
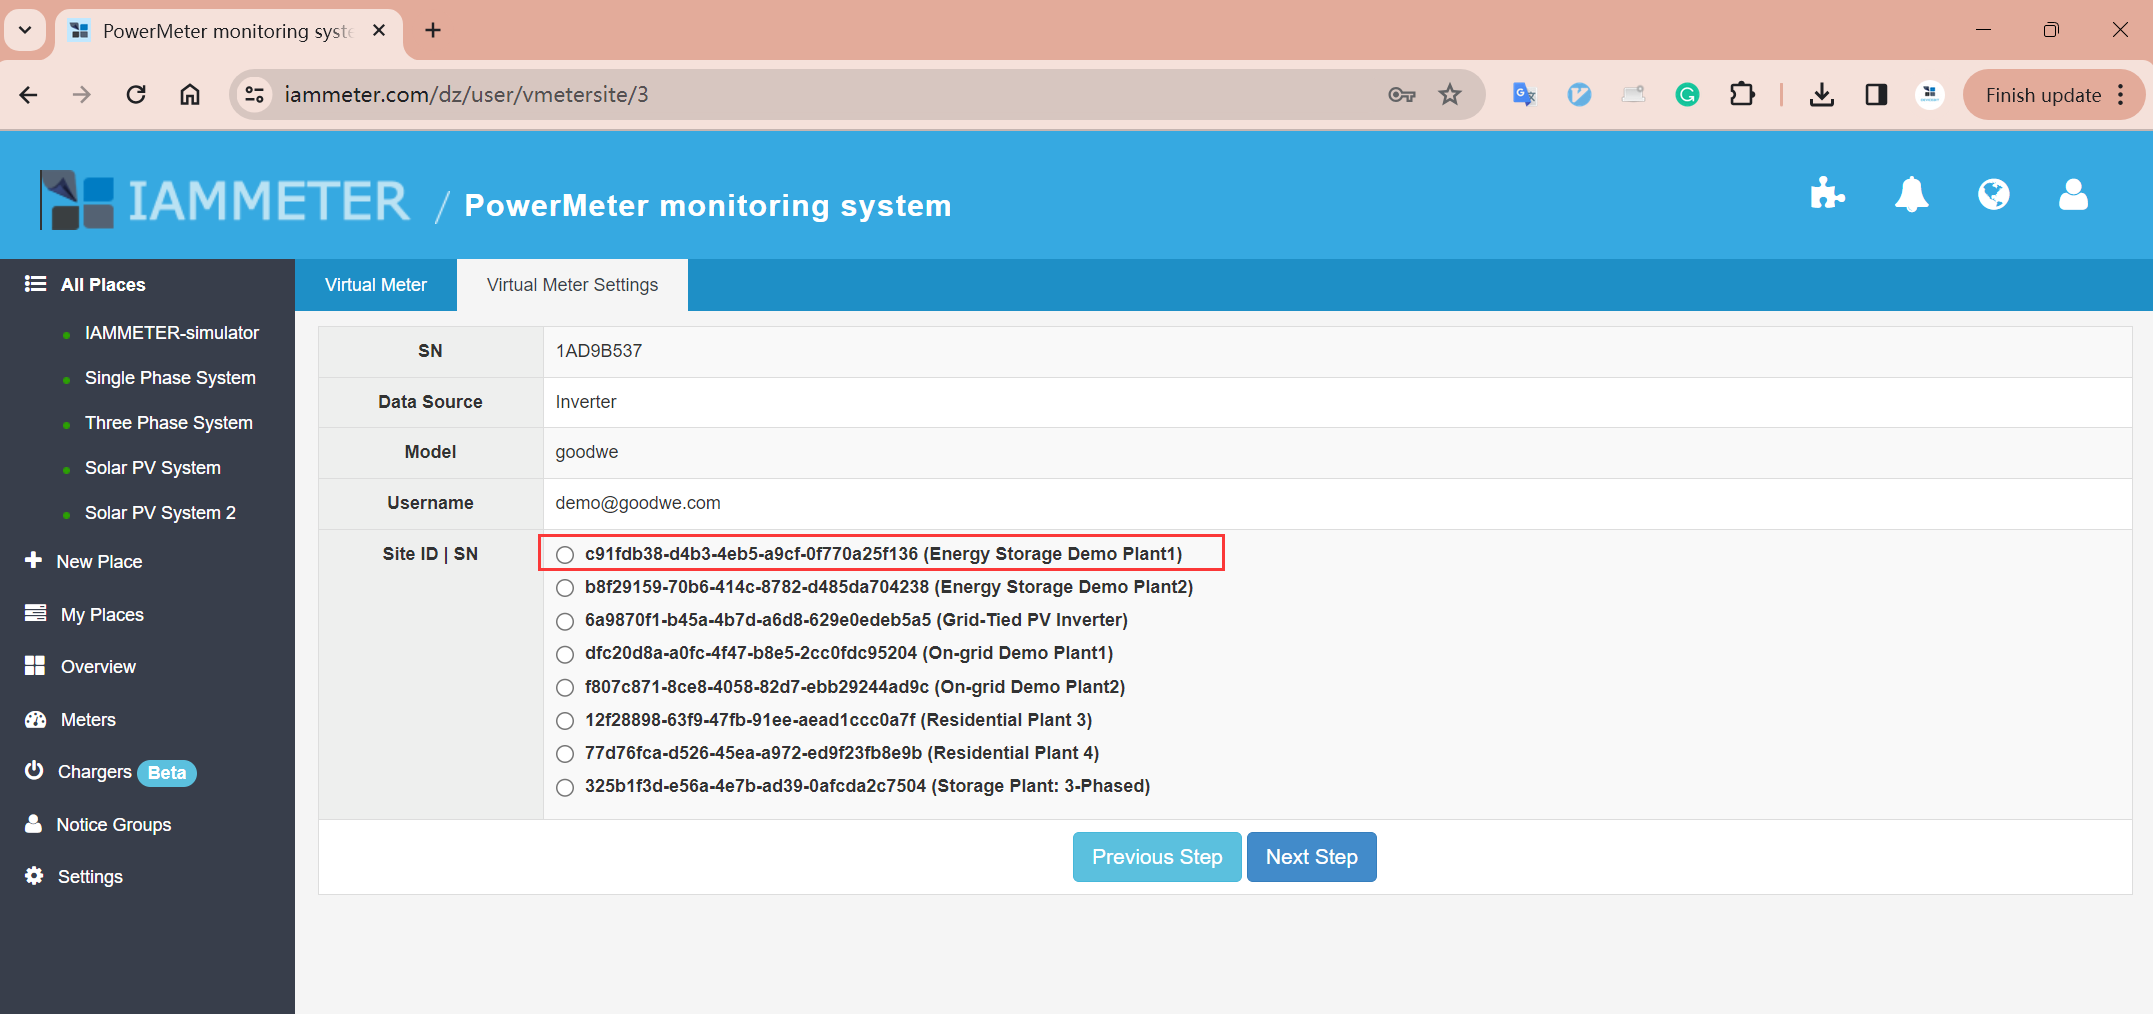
Select the Target Plant Choose the plant from which you want to import data into IAMMETER.
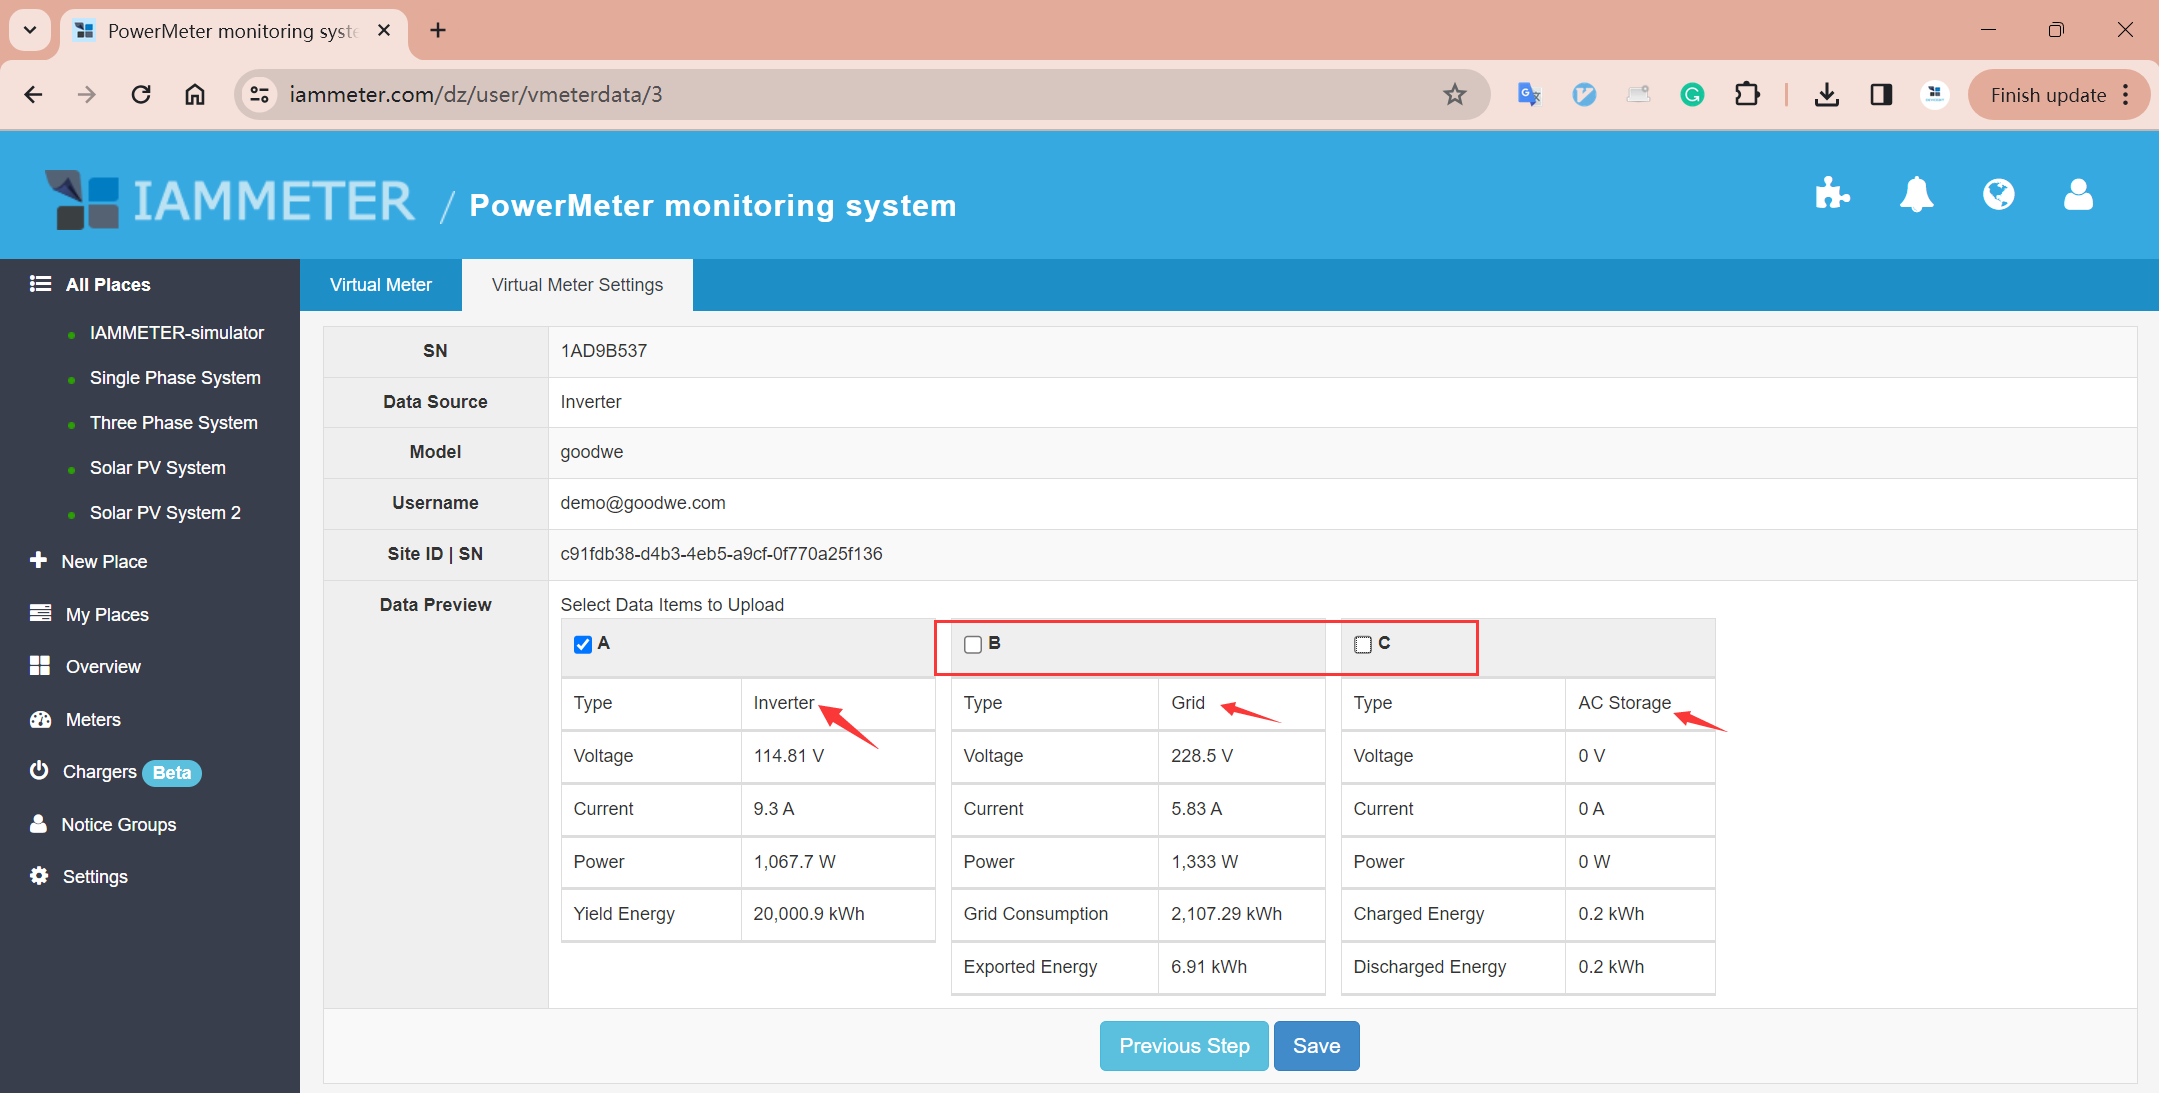
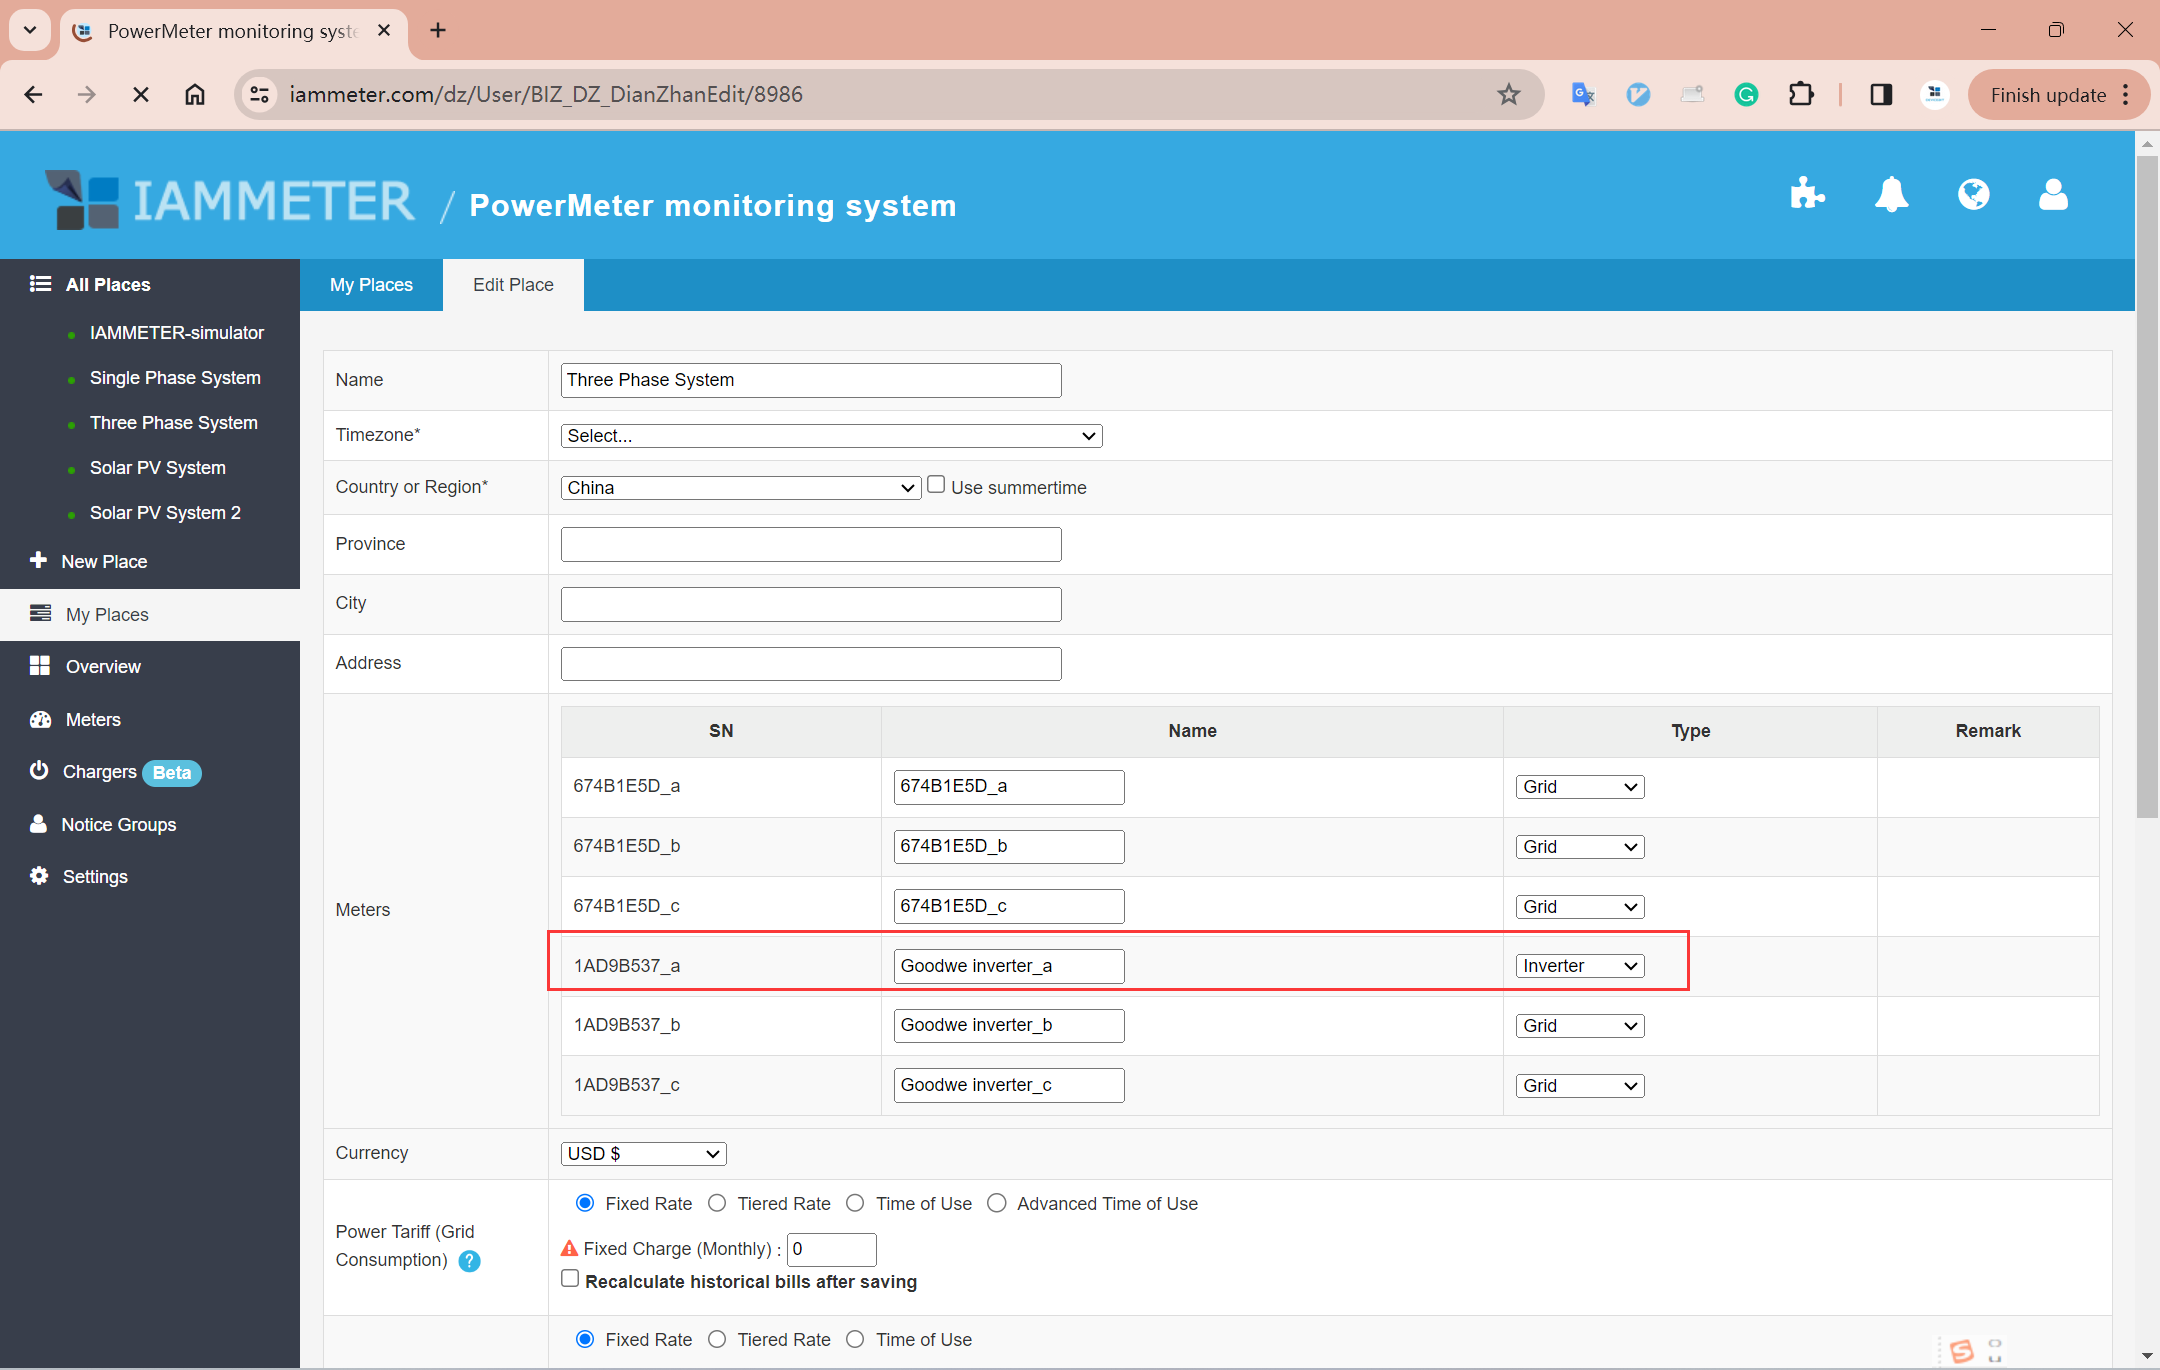
Map Inverter Data to Virtual Meter Phases
The virtual meter works as a 3-phase device, where each phase can be mapped as:
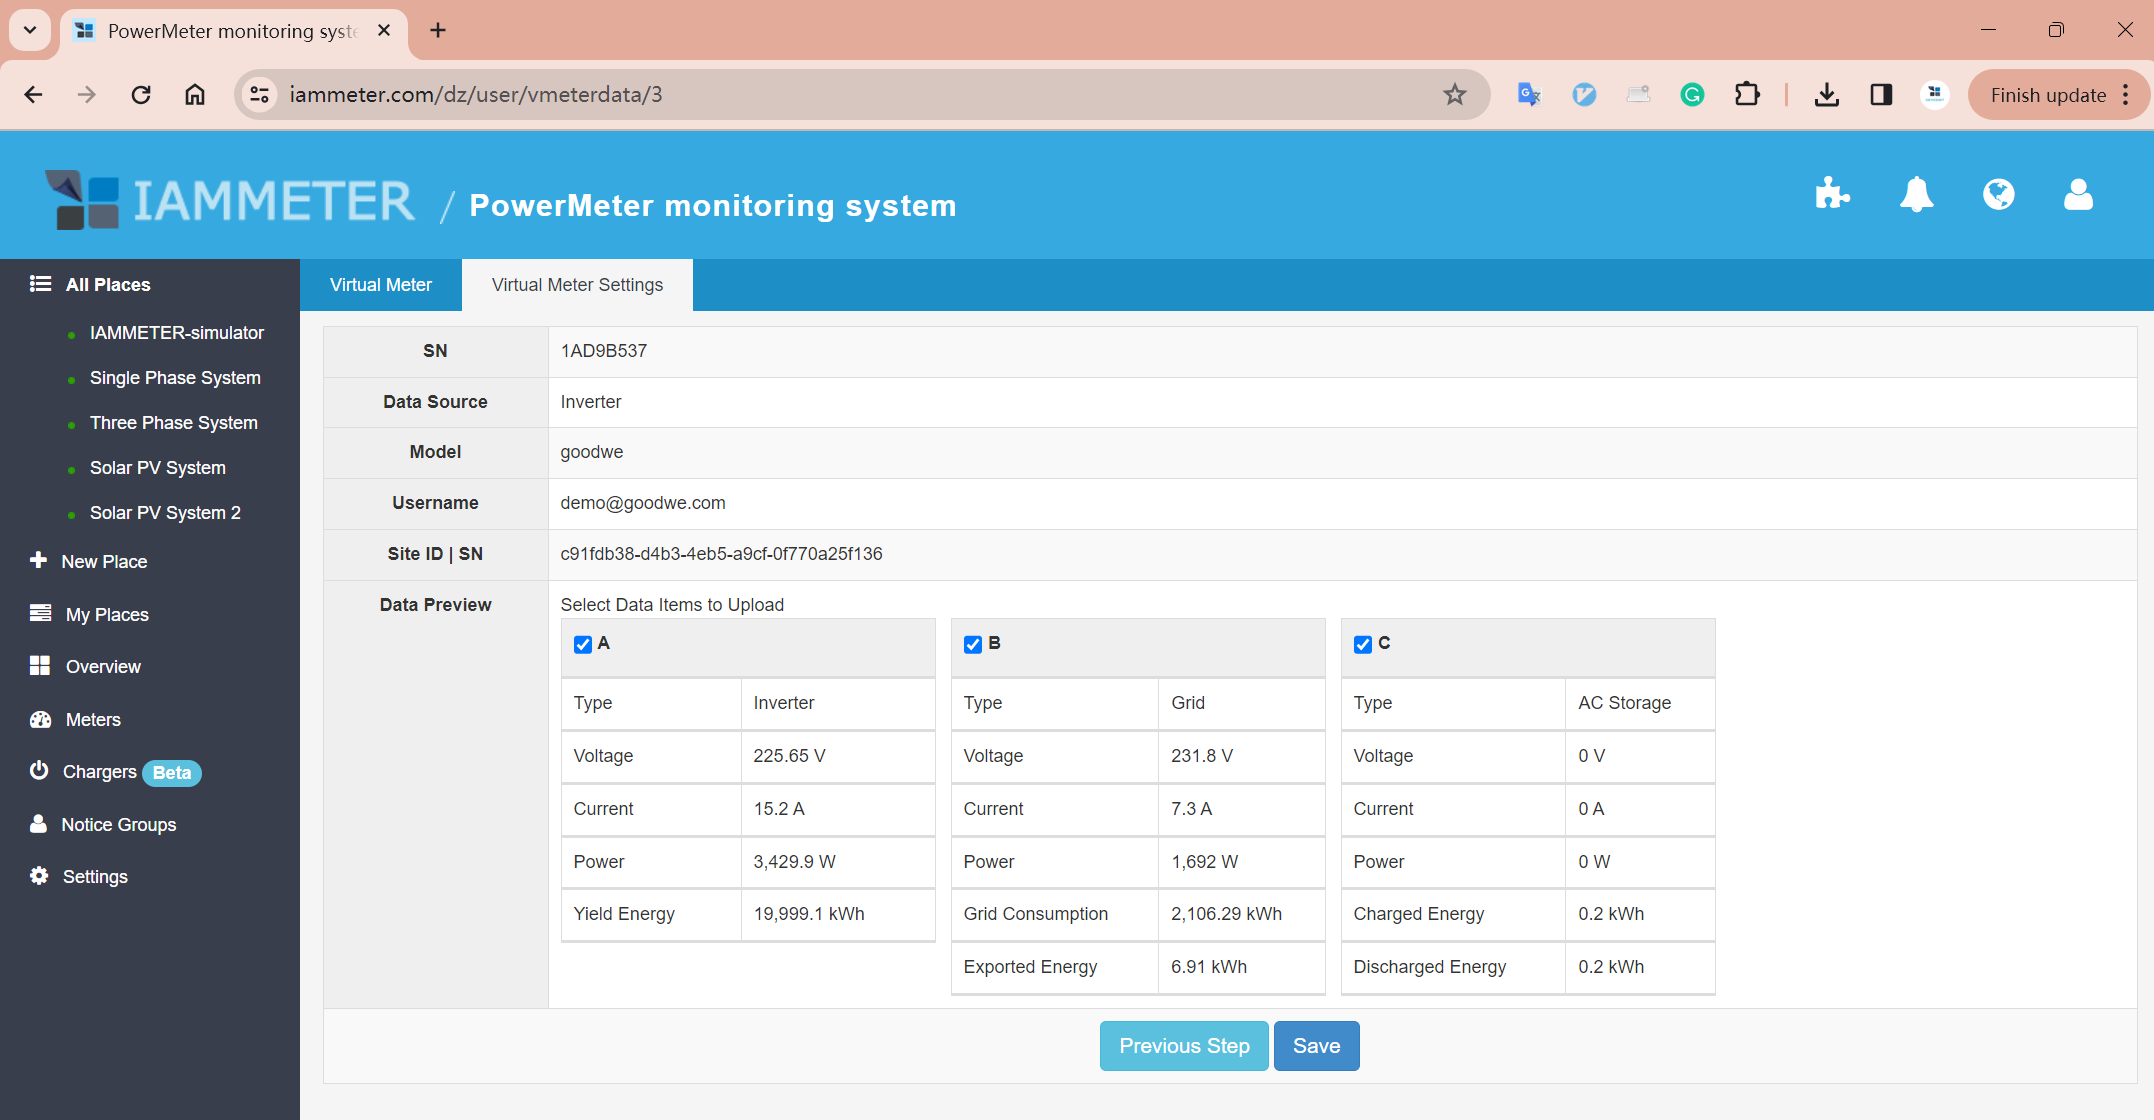
If you only wish to import solar generation data, select only Phase A and click Save.
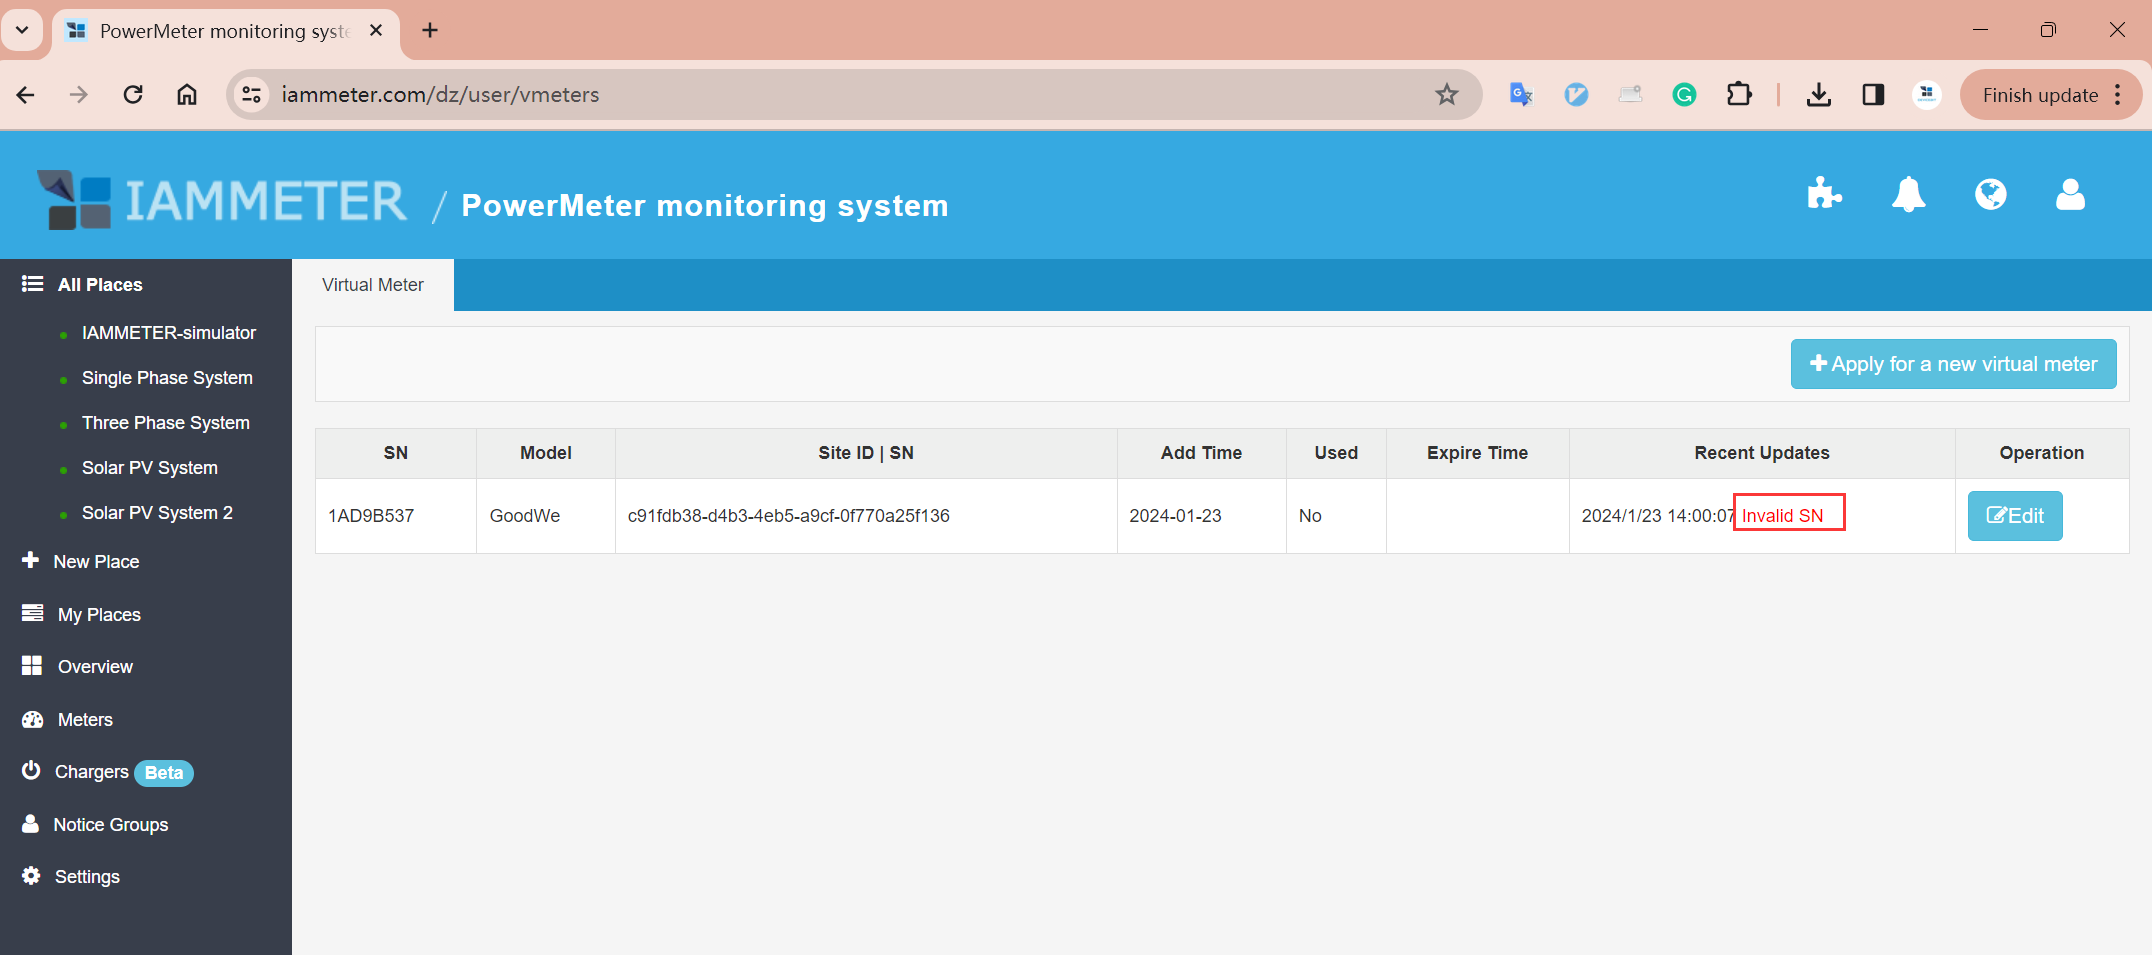
Completion After saving, the virtual meter is successfully created and connected to the Goodwe portal.
You can now use this virtual meter in IAMMETER as if it were a physical device. The procedure is the same as adding a regular meter.
You may:
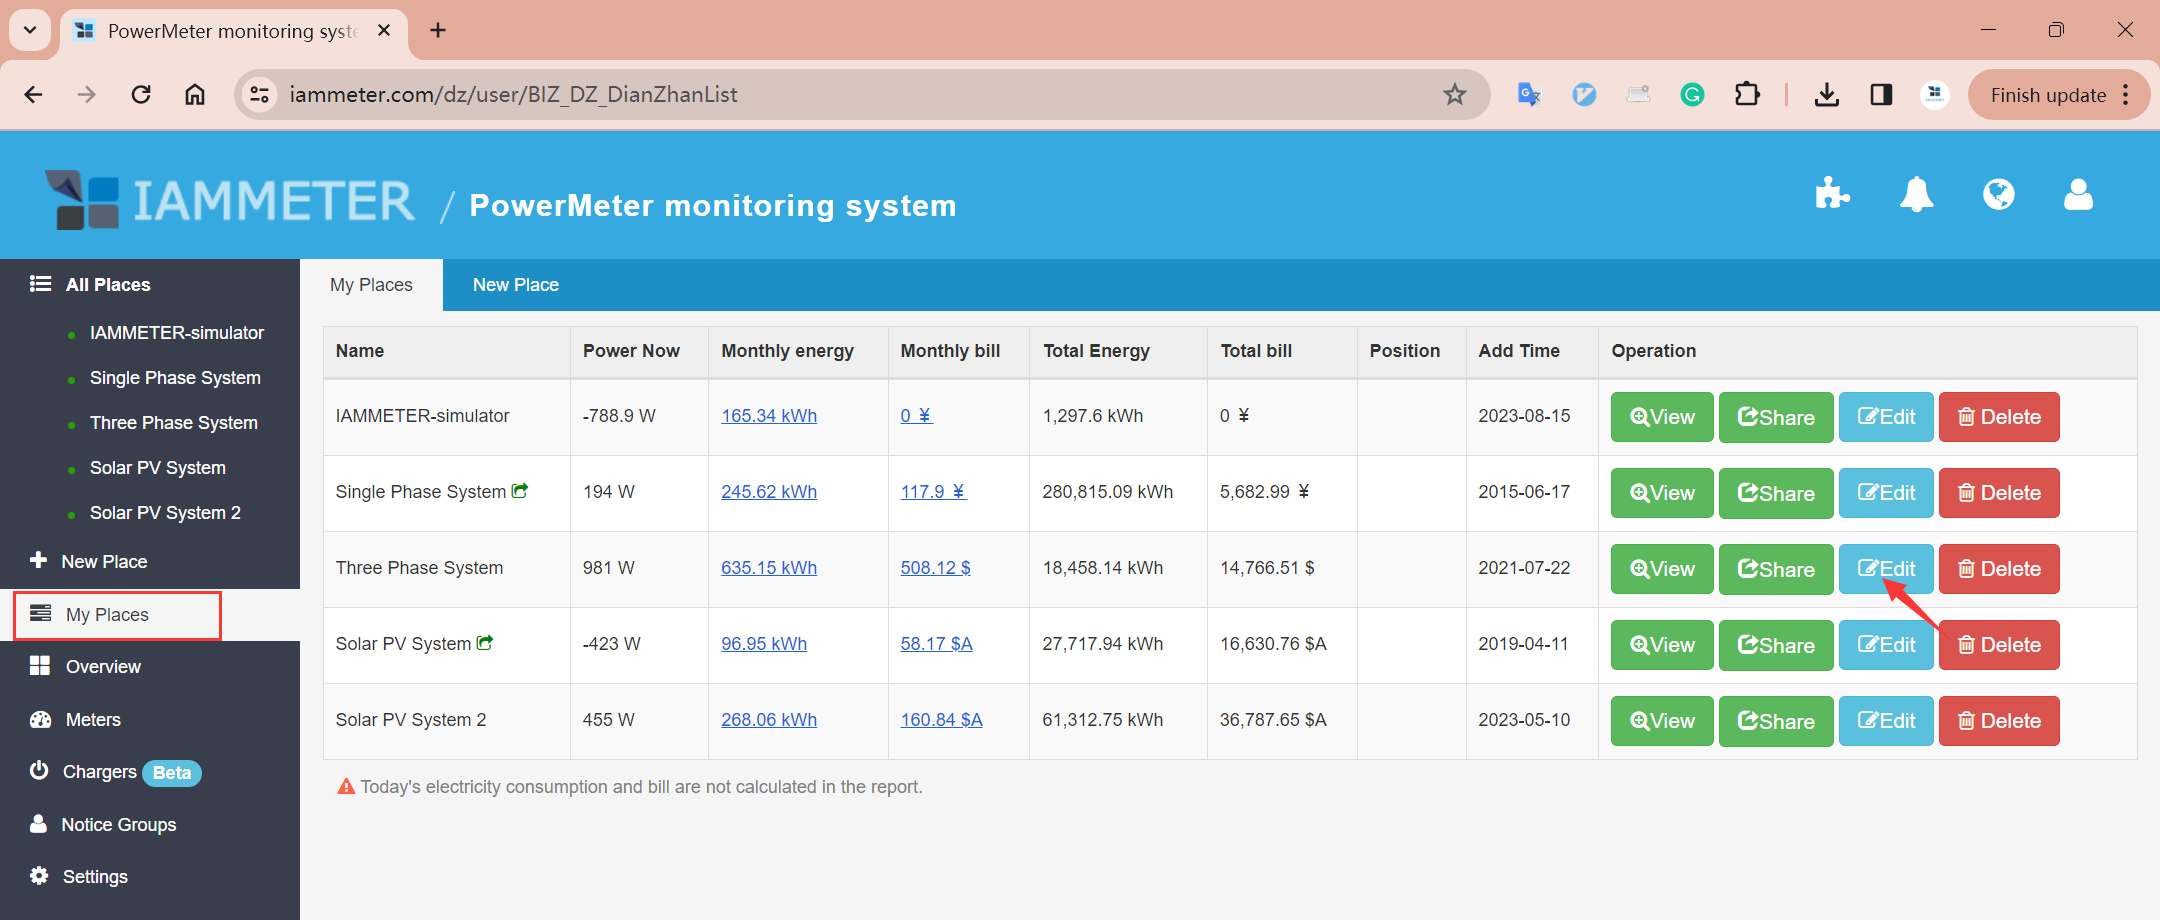
We will demonstrate the case of adding it to an existing place.
Use Case: If a customer already has a grid meter (IAMMETER physical device) and a Goodwe solar inverter at the same location, they can now monitor both with one physical meter and one virtual meter—no need for a second IAMMETER device.
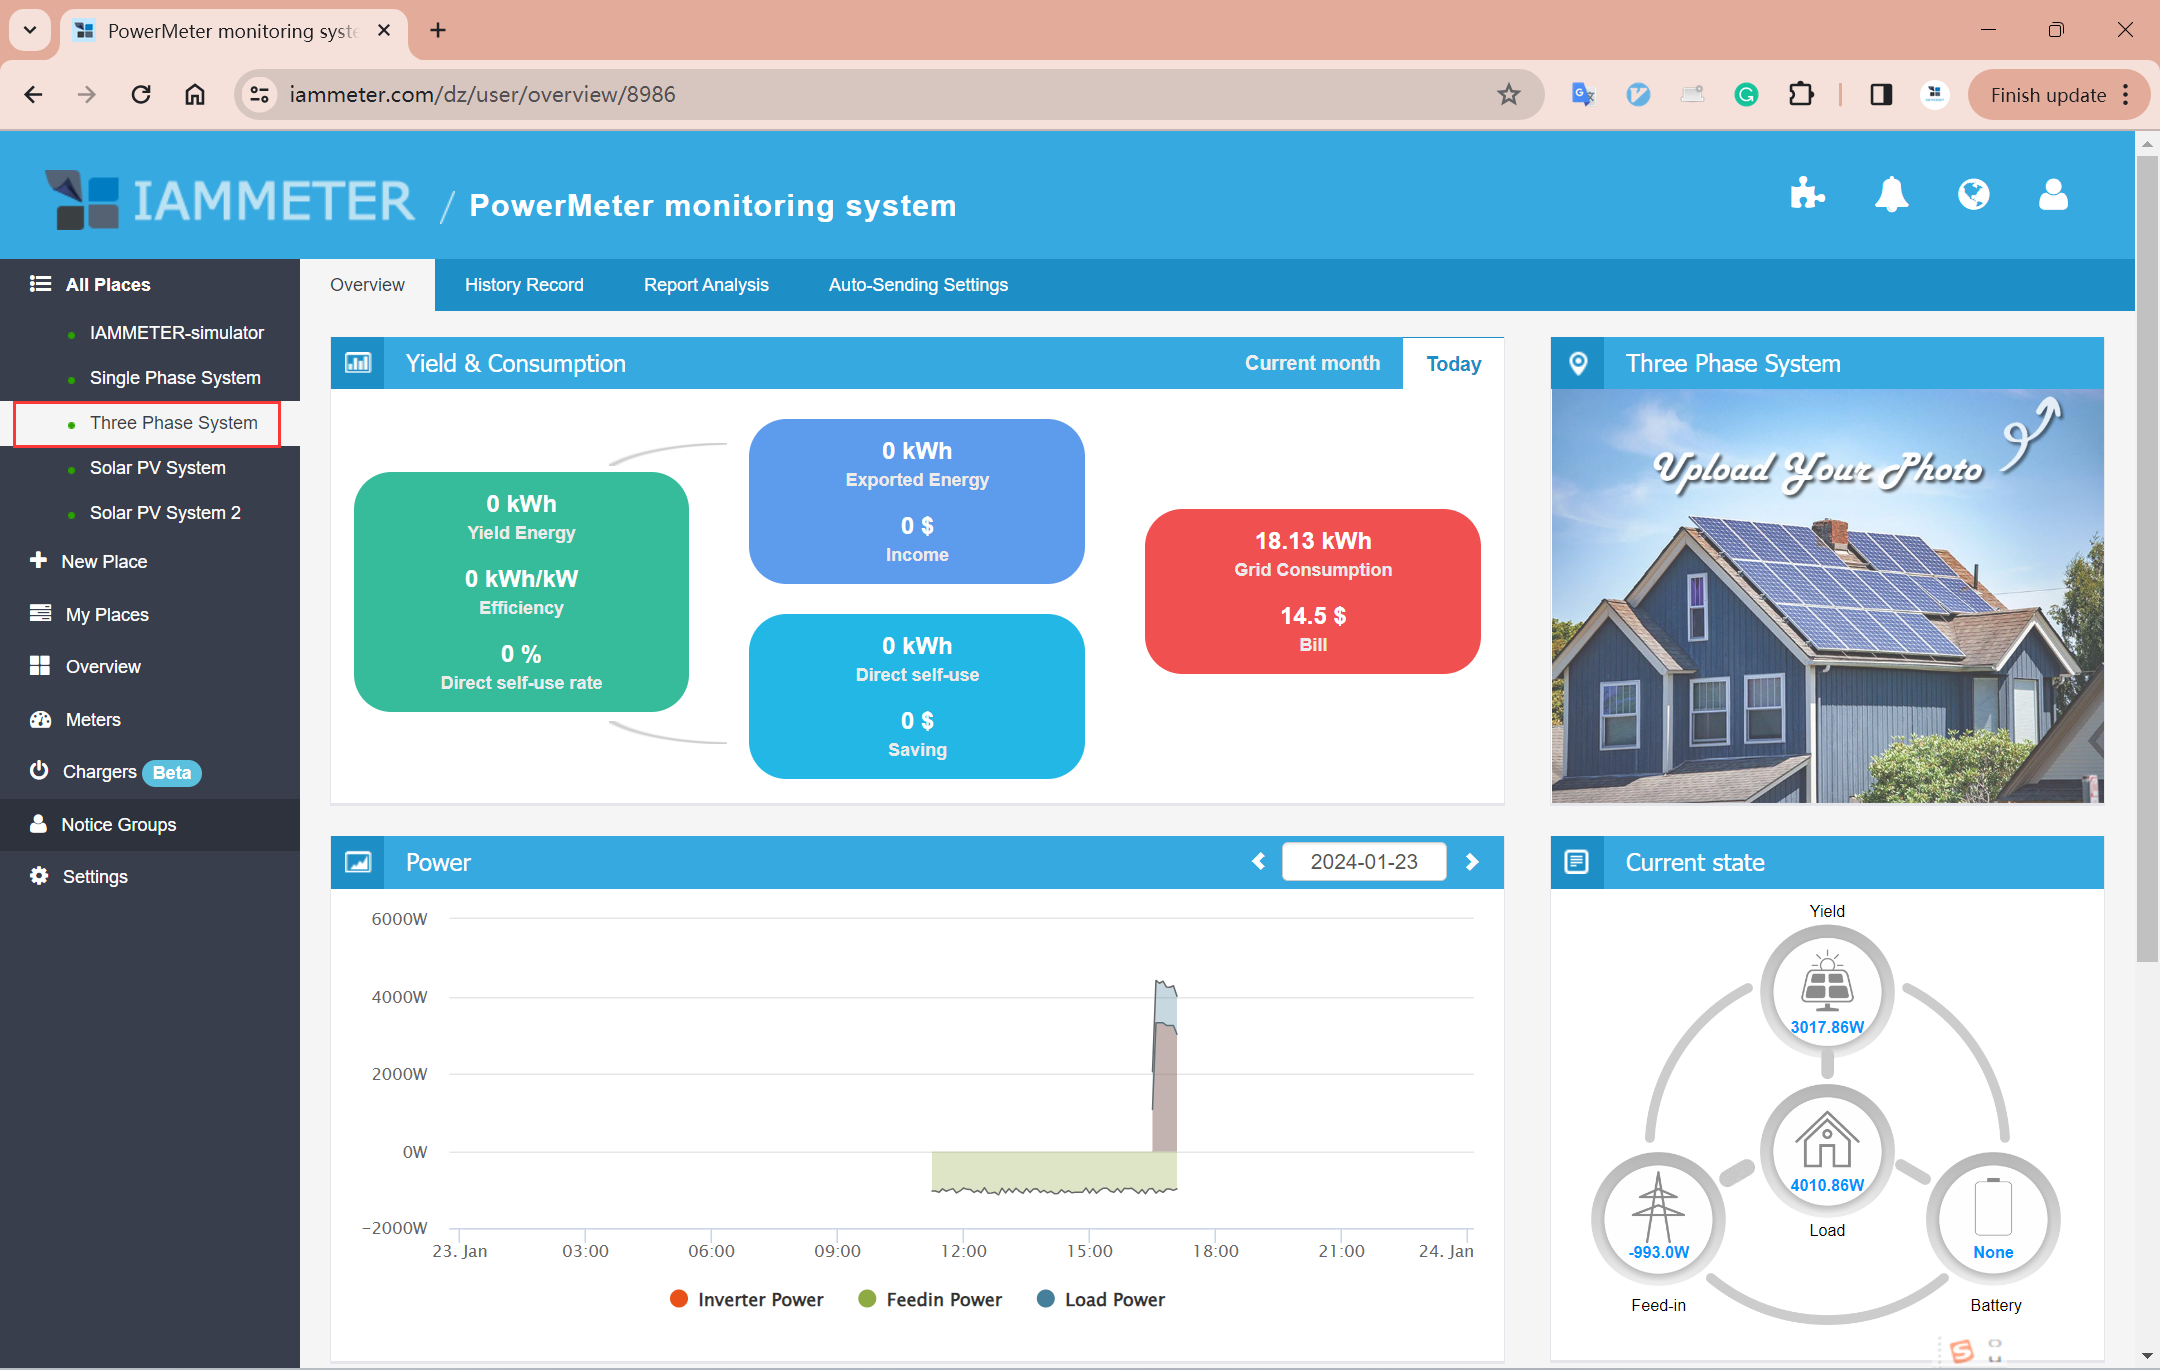
Three Phase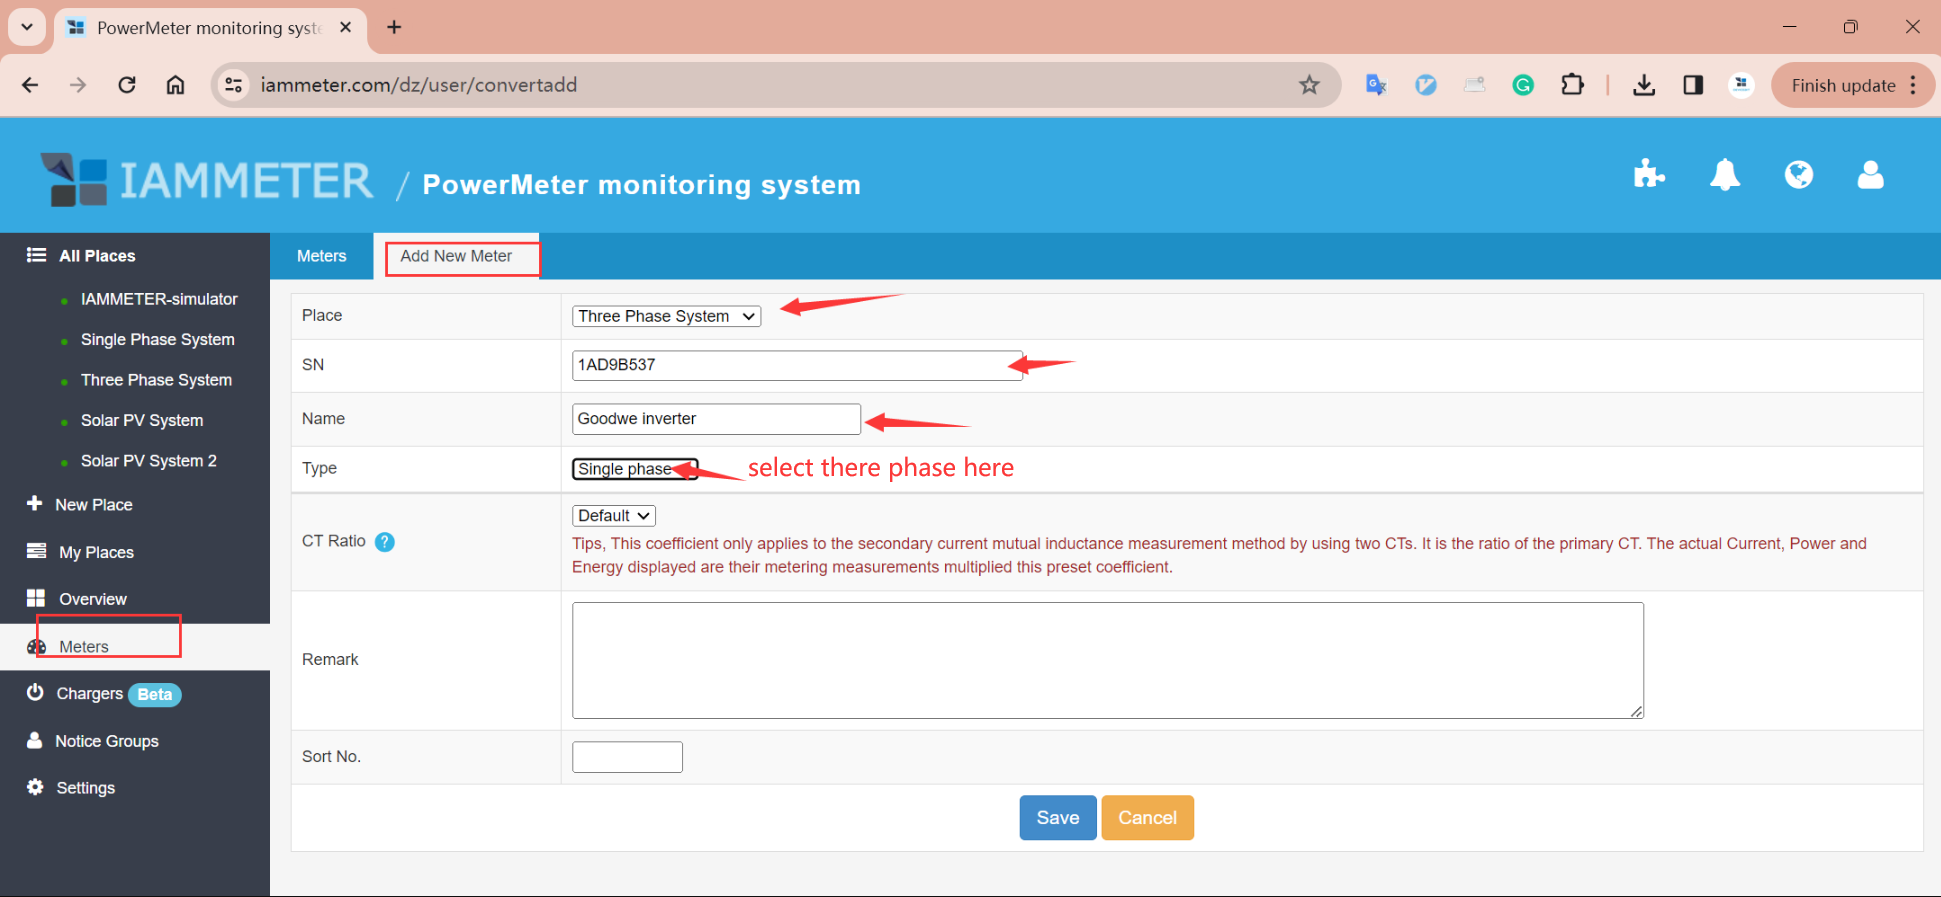
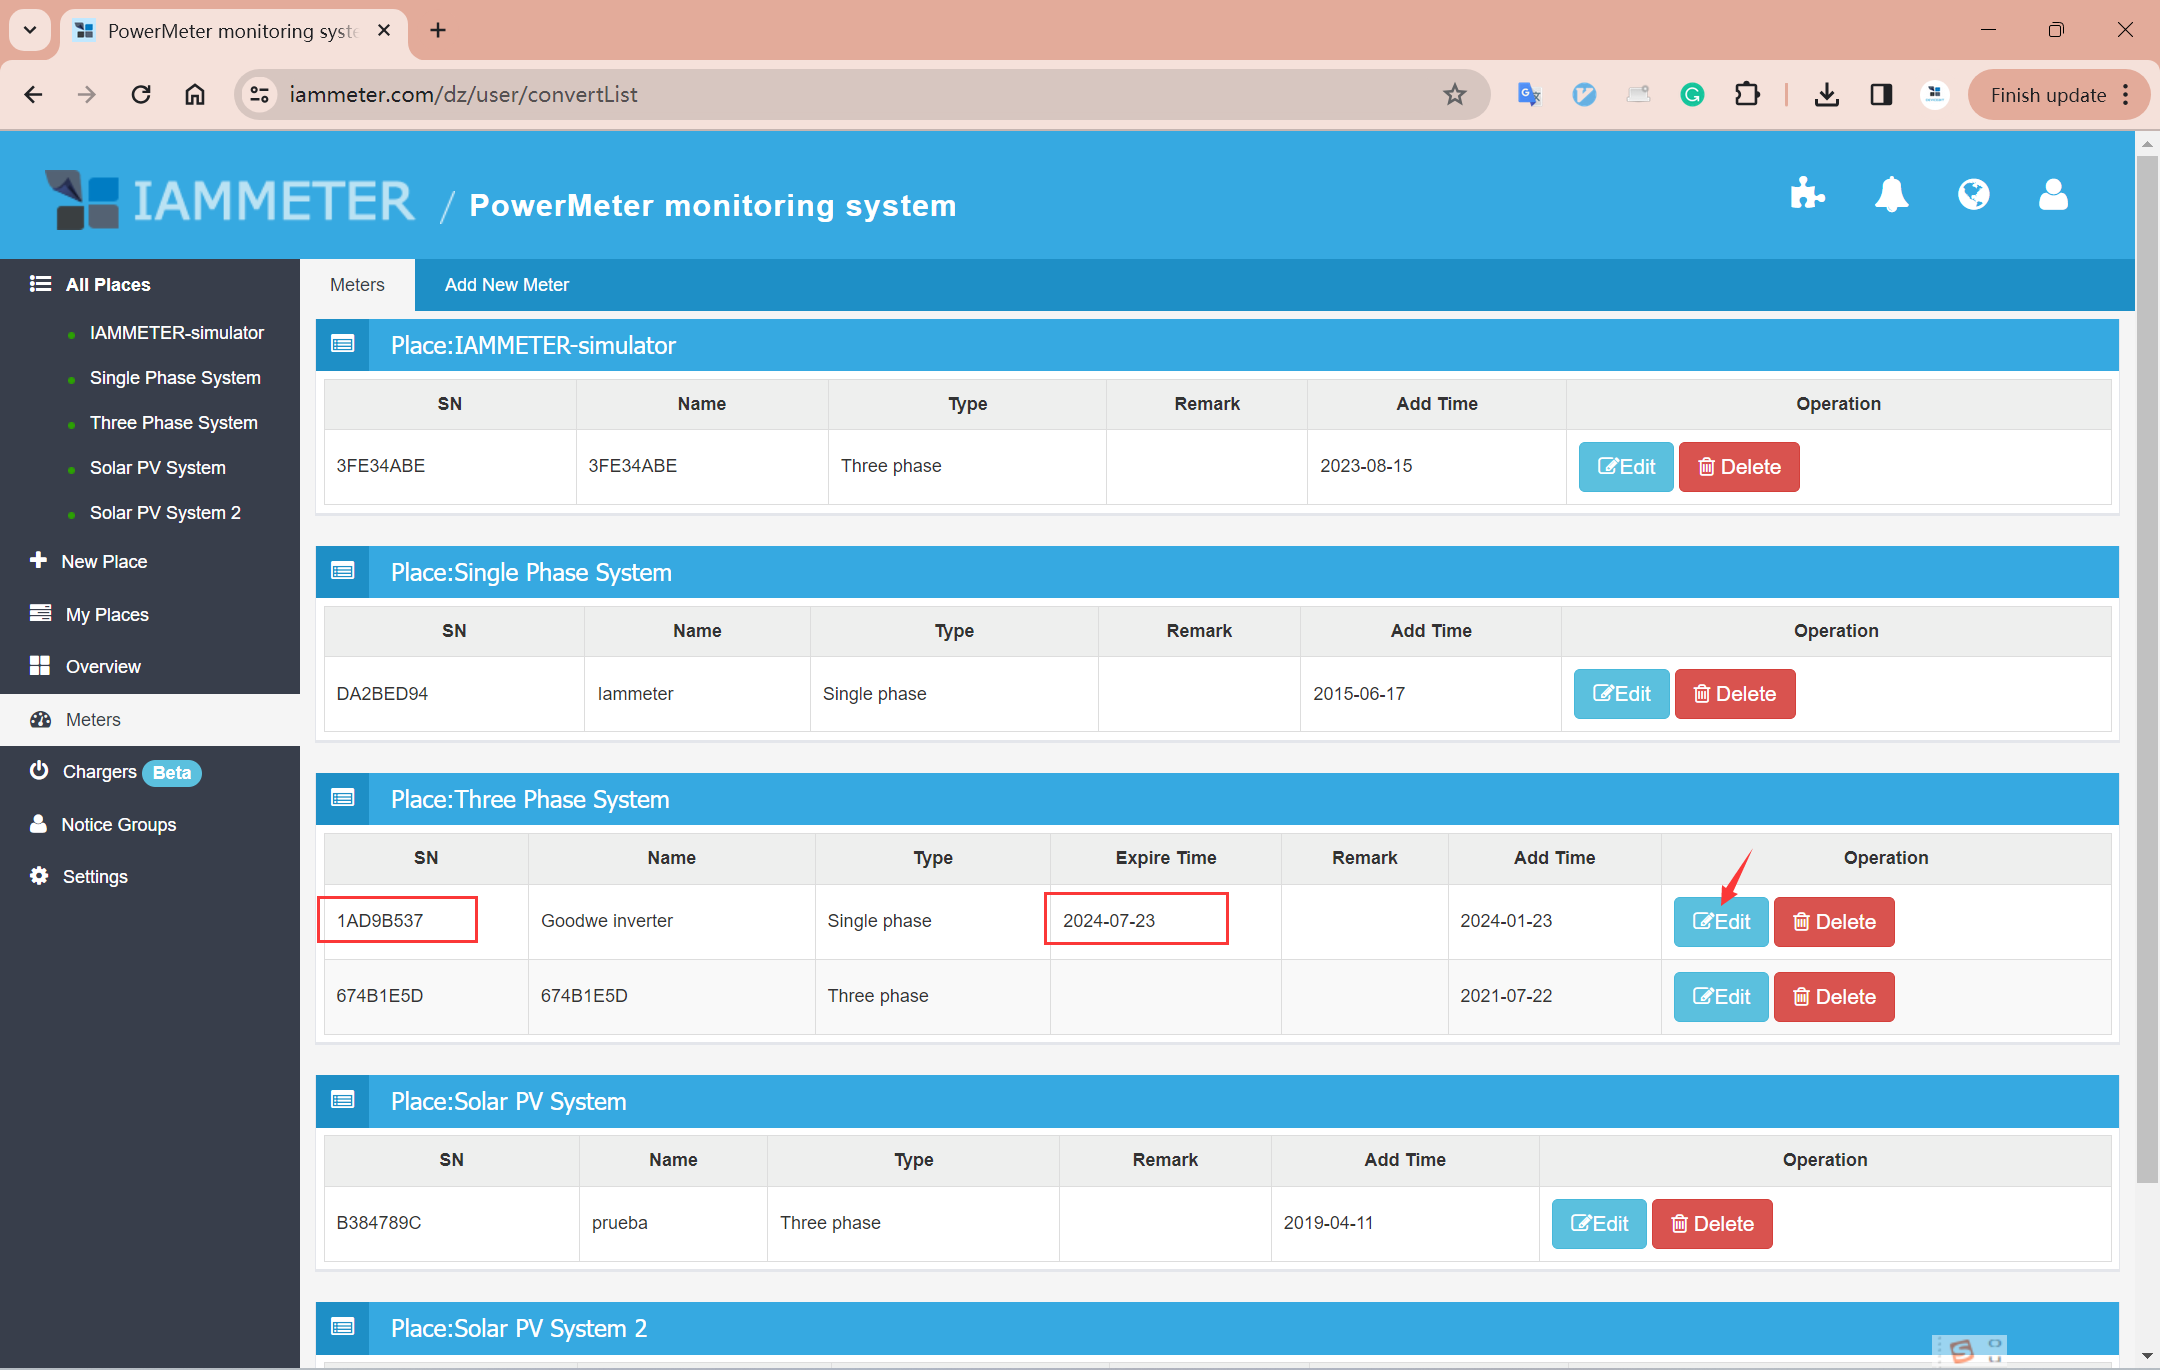
After saving, the virtual meter appears in the meter list.
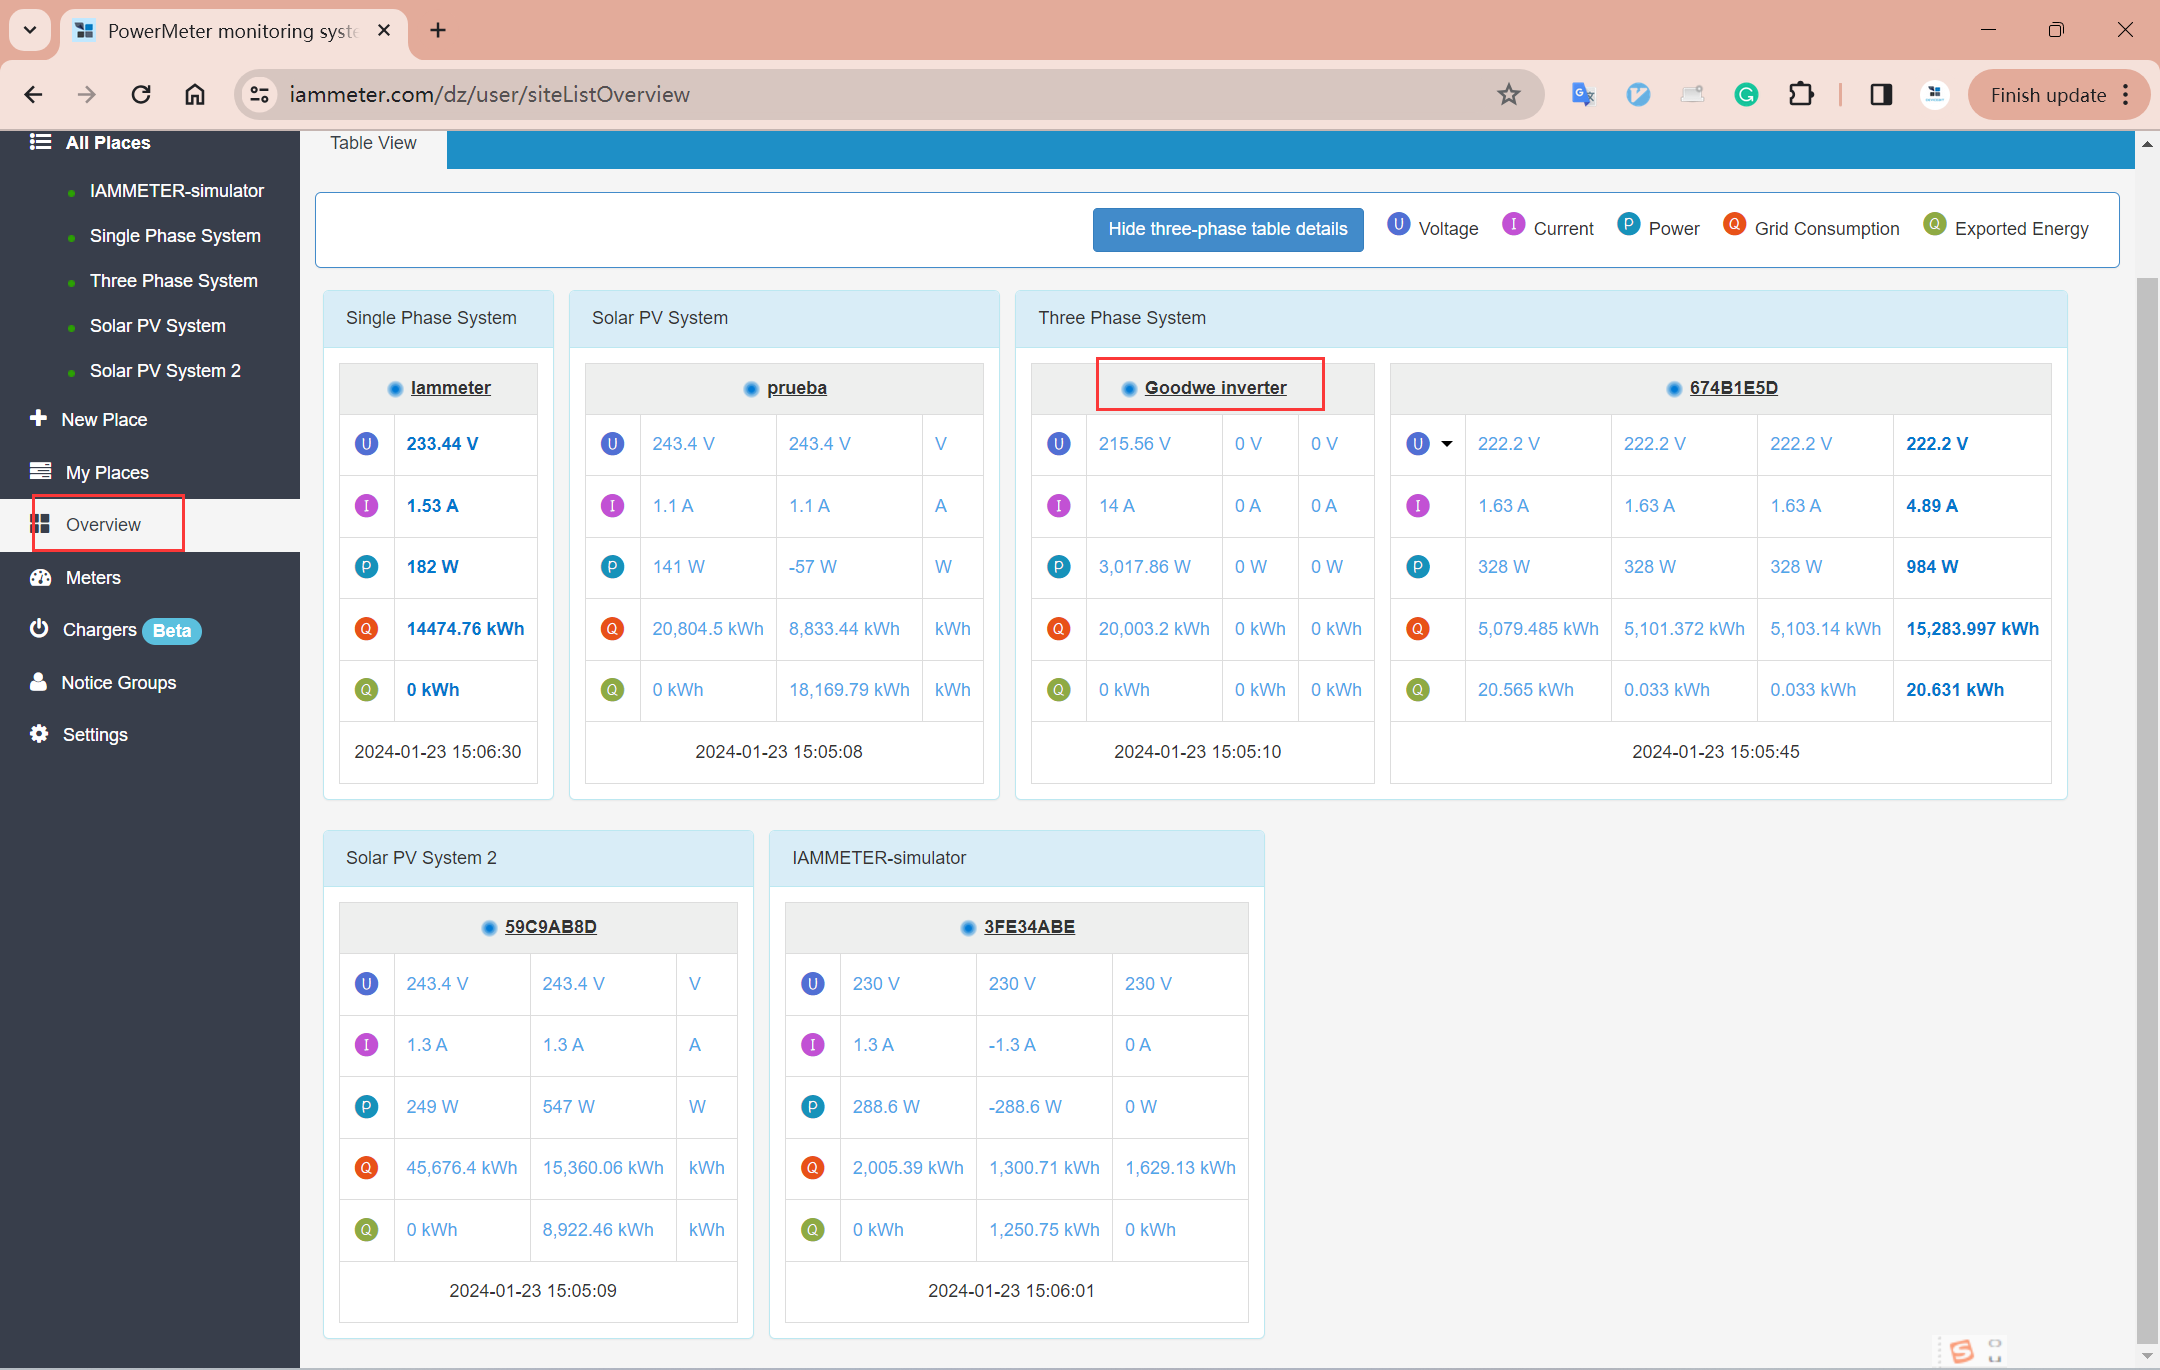
Click on the place to view dashboards and charts of solar generation.
👉 See how to integrate a Solax inverter
We are expanding support for more inverter brands.
Because the cloud integration requires user credentials (username/password or token) from the inverter's monitoring platform, we prioritize inverters where users are willing to help with testing.
If you’re interested in helping us support a new brand:
📧 Contact us:
support#devicebit.com (replace # with @)
Under development

Three Phase Wi-Fi Energy Meter (WEM3080T)

Single Phase Wi-Fi Energy Meter (WEM3080)
")
Three Phase Wi-Fi Energy Meter (WEM3046T)
")
Three Phase Wi-Fi Energy Meter (WEM3050T)